2.1- Assignment (Unit 2): Demonstrate safe siting, lighting and management of a campfire and the surrounding area and explain how this can be taught to a client group
- Naomi Harvey

- Aug 22, 2024
- 10 min read
Provide evidence to discuss the following factors that are essential to consider when lighting fires:
When we are considering lighting a fire, especially in a Forest School setting, there are several important factors we need to take into account to ensure safety, environmental responsibility and compliance with regulations.
Location of fire:
We need to make sure the site is clear of any debris, away from low overhanging branches, dry grass or any flammable materials. We also need to take into account the bedrock and soil types.
A woody light soil can easily catch alight, Clay, stoney or brown muddy soils are a lower risk and not flammable. Rocks and slate, with high intense heat can explode, also any leaf litter is a high risk of catching alight.
If you do not find a suitable place on the ground to have a fire, you can use a fire bowl or place heat resistant bricks into the ground to build a foundation. If you do use the ground, create a fire circle with stones to contain the fire.
Wind Direction:
When you have found a safe space for the fire, think about wind direction, if it is particularly windy that day it would be suggested to not have a fire. It is very easy for the wind to pick up flames and spread, sometimes uncontrollably. Even if there are not strong winds, you must think about the wind direction for that day, and think about if the wind were to pick up any embers, could it cause any surrounding vegetation or other flammable materials to become alight.
We must also be aware of the direction of smoke, this can be unpleasant and harmful for children inhaling too much smoke, try to position the fire so the wind carries the smoke away from the group, if the wind does keep going into the group, be mindful to allow those children to move seats so they are not constantly in smoke.
Health and Safety of the group:
For the health and safety of the group, you should always have on hand near the fire a water source (bucket or tap), sand, or a fire blanket readily available to extinguish any fire.
Remove any debris, leaves, or twigs around the fire site to prevent any accidental spreading.
Always have an adult to supervise the fire, ensuring all children understand the distance they must keep from the fire and rules of no running in the area or touching of the fire.
We must have a fire glove as well, for any adult that may need to attend to the fire or take something on or off the fire.
We must always have with us a first aid kit and and Fire first aid kit, these are slightly different as it will include burn dressings, gel pads, non-adherent dressing, burn relief and possibly breathing masks to help with smoke inhalation.
Rules for Forest School during a fire:
Walk around the fire
Sit on the logs provided around the fire and do not move them
Only approach fire when an adult tells you, if close kneel next to the fire
Always enter through the ‘in’ entrance and exit through the ‘out’
Stay seated throughout the session unless told otherwise by an adult.
Other Factors:
Water availability - Always make sure we have some access to water, enough to extinguish a fire, even if you have a tap nearby, still have a bucket ready full of water in case of an emergency.
Size of the fire - Think about the space you are using, the trees surrounding or the canopy, be aware of the size and make sure if using the ground you have laid a perimeter to keep the fire from spreading. In our own Forest School, if we were ever going to light one, this would be designed just to show the children how we light and maintain a fire safely, this would only require a small safe fire.
Permissions:
Ensure we have permission from the landowners and the Trust (specific to our site). Make sure there are no local fire bans, especially during dry seasons.
Environmental Impact:
Consider the environmental impact of your fire. Use deadwood from the ground rather than cutting live branches. Make sure when it comes to clearing your fire, fully extinguish the fire and leave the site as you found it.
Describe the elements of the fire triangle and identify the qualities of the following:
Fire Triangle

This is the fire triangle. To light a fire we need an equal amount of oxygen, fuel and heat. Without these three elements, the fire will not be successful, if one of these elements were taken out of the equation the fire would go out. We create the heat with a spark, using a fire steel. Once the fire has caught light to our source and starting to create heat we then need to add fuel by using materials such as wood, coal or charcoal. The oxygen is added to the mix naturally from the air, but we need to make sure air is able to get access to the fire, we can also add more by blowing into the base of the fire if needed.
To create the fire triangle we need:
Tinder - This is the most easily combustible material and is used to start a fire. It should be dry, light and easy to ignite. Tinder burns quickly and creates the initial flames.
Examples for tinder:
Dry Leaves
Grass
Bark Shavings
Wood Shavings
Cotton Wool
Birch Bark
Feather Sticks
Kindling - Kindling is slightly larger than tinder and is used to build the fire once the tinder is burning. It should catch fire easily from the tinder and burn hot enough to ignite the larger fuel.
Example of kindling:
Small twigs
Sticks
Splintered wood
Fuel:
Fuel is the larger wood or material that sustains the fire once it is established. It should be dry and dense to burn slowly and steadily, providing the long-lasting heat required for cooking or warmth.
Example of Fuel:
Larger branches
Logs
Chunks of wood
How to identify dry standing deadwood:
Dry standing deadwood refers to wood that is still attached to a tree but is dead and dry. Often having a grayish or weathered appearance, no leaves and makes a hollow sound when tapped. The bark may peel away easily and the wood is generally lighter in weight compared to living wood.
How to identify punk
Punk wood is a type of decayed wood that is soft, crumbly and can absorb sparks easily. It is typically found on dead trees or logs and is often spongy in texture, Punk is excellent for catching and holding an ember from a fire steel.
Types of fungi that can be used
There are a few types of fungi that can be used to fuel a fire:
Tinder Fungus - It is a spongy material often found on the bark of coniferous trees. It can be processed into a fibrous material that readily catches a spark.
King Alfred's Cakes - Small black fungus that grows on dying ash trees. When it is dry it can easily catch a spark.
Birch Polypore - Found on dead or dying Birch trees, this fungus can be used to produce a slow-burning ember that can help ignite other tinder.
What can be done if resources aren't available
If using traditional resources like dry wood, tinder and kindling are not available, there are a few other options.
Cotton Wool - These are really good fire starters, by coating the cotton wall in petroleum jelly (vaseline) and spreading it out are flammable.
Feather sticks - If the wood is wet, you can create feather sticks by shaving the wet bark off to expose dry wood. The fine curls created by shavings can catch a spark.
Natural Alternatives - Dry grass, moss or leaves can work as a substitute for tinder, pine needles or cones can also work.
Fire lighting equipment and procedures for use:
Quick methods of lighting a fire enables us to light a fire quickly using reliable and easy to carry tools. These methods are ideals for situations where a fire is needed quickly or when conditions are challenging.
Fire Steel - This is a tool that is easy to use (once you’ve learnt!) and easy to carry. A rod made of metal alloy that produces hot sparks when scraped with a hard object usually a striker.
Holding the steel down towards the tinder of choice, use the striker/scraper to slowly scrape towards the catalyst, this will create a spark (may take a few attempts) and create fire.
Matches - Simple and widely used and available, strike the match against striker strip to create a flame to light fire. These can be useful, however, if out in the forest and it is wet, damp matches do not work as well, if at all.
Lighter - Small device that produces a flame by using butane, using your thumb on top of the revolving striker, fingers around the bottom of the lighter, quickly push down, releasing butane against a spark created. Lighters are quick and useful, however, only creates a small flame and therefore can be difficult to light inside a small fire without burning yourself.
Magnesium blocks or strikers
Using magnesium blocks or strikers is a reliable method for starting a fire, especially in challenging conditions like wet or windy weather. Magnesium blocks are a popular choice in survival kits because they are compact, lightweight and easy to use.
A magnesium block is a small, rectangular block of magnesium, often with a fire steel attached to one side. Magnesium is highly flammable and burns at high temperature.
Scrape the block to create small shavings or filings which are then ignited using the fire steel or another spark source.
A striker is used to scrape both the magnesium block and fire steel. Use the striker by quickly and firmly moving against the magnesium block to create shavings and then on the fire steel to create the spark.
Natural Resource Method -
Bow drills
Using a bow drill to start a fire is a traditional and effective technique, though it does require practice and patience.
The bow is a sturdy, curved stick about the length of your arm, a string/rope is tied at both ends to create tension. This can be made from a flexible green branch.
The drill also known as the spindle, a straight stick about 8-12 inches long. The ends are rounded with one end being the point that drills into the board, this should be made from hardwood like oak or maple.
We then need a Heath Board, a flat piece of wood with a carved depression and a notch where the drill will be placed, using a softer wood like cedar or pine works well, as it needs to create friction quickly.
A handhold, small piece of wood used to hold the top of the drill in place while drilling.
We will also need a tinder bundle of dry material to catch the ember and start the fire.
Procedure:
Prepare the hearth board - carve a small depression near the edge of the hearth board and cut a v-shaped notch from the edge of the board into the depression.
Create the bow - Loop the rope around the drill so it is tight but can still rotate. Hold the bow with your dominant hand.
Place the pointed end of the drill into the depression on the hearth board, position the handhold on top of the drill to hold it steady, Apply downward pressure to keep the drill in place while you rotate it with use of the bow.
Move the bow back and forth in a sawing motion, this will cause friction at the end of the drill, generating heat and creating wood dust in the notch.
Continue until you see smoke and wood dust in the notch and start to turn dark, keep going until you can see a glowing ember. Gently tap the ember onto your timer bundle.
Blow gently on the ember adding oxygen to your fire triangle, to help it grow and gradually increase the airflow until it catches fire.
One the tinder is burning, gradually add kindling and build up your fire.
Hand Drill
A simpler method to the bow drill, just without the bow, you spin the drill between your palms to create the friction, this method does require more skill and endurance.
Fire Plow
This is a primitive method where a stick is rubbed back and forth in a groove on a flat piece of wood. Usually using a hardwood for the stick and rubbing on softer wood. This method creates wood dust that ignites into ember.
Char Cloth
A char cloth is a great tool for starting a fire. Using a natural fabric such as 100% cotton or linen such as an old t-shirt or denim cut/rip the fabric into small strips roughly about 1-2 inches in size.
Place the fabric pieces inside a metal container, it must have a lid, and ensure the pieces are loosely packed to allow for even charring. Secure the lid tightly, poke a tiny hole in the lid, this allows gases to escape during the charring process.
Place the metal container on a heat source, as the fabric heats up it will start to char. You may see smoke or gases escaping through the small hole.
Keep the container on the heat until the smoke stops coming out. This can typically take between 5-15 minutes, depending on size of container and heat source.
Once the smoking stops, remove the container, using a heat glove and allow it to cool completely. Allowing the cloth too cool helps prevent the cloth igniting when exposed to oxygen.
When cooled, open the container, the fabric should be completely black and brittle, break apart easily but not reduced to ash. If not quite ready you can return to heat and repeat the process.
To use for fire starting:
Place some char cloth in a safe space to begin a fire, using your fire steel, strike the steel and sparks should ignite the char cloth, once smouldering, prepare a small tinder bundle and gently blow to ignite tinder.
Part 2:
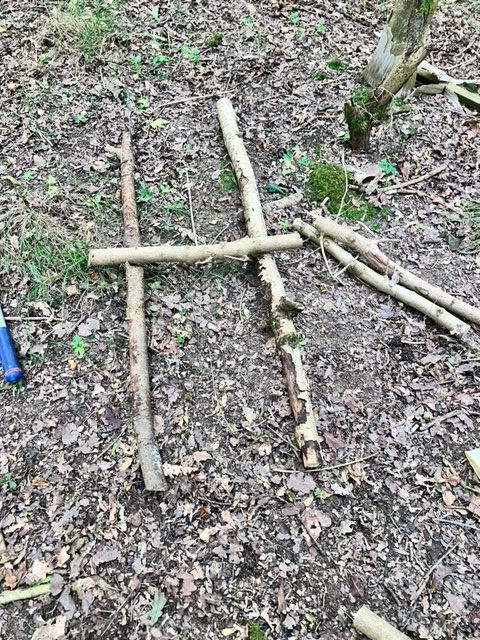
Visually demonstrate the safe siting, lighting and management of a campfire and the surrounding area.
I chose to use a permanent fire pit to demonstrate my fire lighting. The site is free of any loose debris under the bowl, it has been placed away from any overhanging trees and it is placed on legs off the ground to not allow the heat to transfer to the grass underneath.
I began by collecting small twigs as tinder for the fire, and then found some larger bits of wood that had been discarded to help fuel the fire.
I came prepared with cotton wool, vaseline and my fire steel. I prepared the fire by laying vaseline-covered cotton wool, which I had pulled apart slightly and covered the base. I then laid some timber over the cotton wool in jenga-like style.
I started the fire using my fire steel, this took a few attempts, but I got it in the end. Once the fire was going I added my kindling, which I found locally.
I stayed and watched my fire, fueling it with more kindling when needed. After 10 minutes, I did not add any more fuel to the fire and let it naturally die down. It took about 3 hours before this small fire was completely cooled and showed no glowing embers.
As this is a permanent site I did not need to remove the bowl, however, I made sure the surroundings of the fire were not warm and nothing was left behind.
A short video of me using my fire steel to start the fire.
A time lapse video to show the fire burning for a long period of time.

Fire Safely burning.

How I left the fire site.
Comments